Studio work is nearly the exact opposite from location shooting, especially for portraits. With location portrait shoots, the focus is easily on the person posing, but the surrounding elements also contribute to the final product. Also, the photography studio presents some more challenging lighting situations for both amateur and professional photographers, as the photographer needs to create the light source, rather than modify what the sun is providing.
A fantastic way to skyrocket your natural light photography skills is to practice with your Phone Camera. This week, if you grab iPhone Photo Academy at a huge discount, we will also send your our “Natural Light Buddy Notes” absolutely free. Secure the offer here.
Because photo studio work alone can be intimidating, adding in people can often make things nerve-racking. You may be upset that your studio portraits are not turning out the way you expected them to.
Here Are 12 Tips For Shooting Studio Portraits:
1. Think Of Shooting In A Studio Like A Bowling Alley

With your model in place, and you directly in front of them, you can only move forward and back. You cannot move to the left or right, and depending how wide your lighting is, neither can the model. Rather then take two steps to the left, you will have to ask the model to turn.
Find Out How To Work Effectively With Models:
- The Secret to Working Effectively with Models
- Photographers Shooting Inexperienced Models – You Need To Read This
- Why Every Photographer Should Know These Common Mistakes Made By Models
2. Watch The Clock

Not for time, but for direction to your model. It's very easy to confuse and get confused if you ask them to turn right or left, but turning clockwise or counter-clockwise is the same for you and the model.
3. Who's Right?
While clockwise and counter-clockwise will help to an extent, sometimes you need the model to move right or left, and for this, you'll need to know who's right. It's best if you can train your mind to ask them to move to their right, so they don't have to think about where to go. This is very important when dealing with models who don't do it professionally, like high school seniors.
4. Go Prime
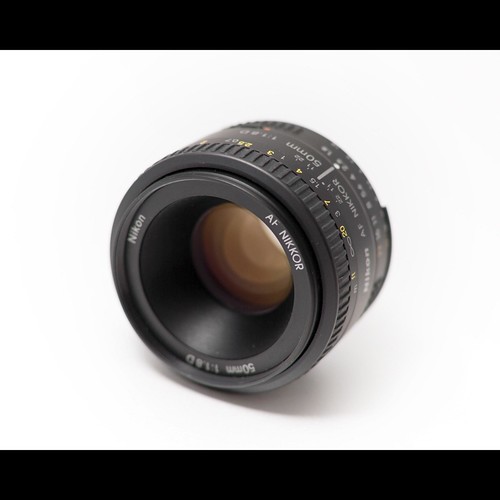
There is and always will be arguments for zoom lenses in the studio, but if you can, stick with primes. They tend to be sharper and it's one less setting you have to do. The standard lens most studio portrait shooters use will fall somewhere between about 80mm and 200 mm. If you shoot a cropped sensor camera, don't forget to include this into your choice of lens.
Canon full-frame shooters tend to prefer lenses like the 85mm f/1.2 and 135mm f/2, while cropped sensor shooters tend to prefer the 50mm f/1.2 and f/1.4 lenses. Nikon shooters as well lean towards the 85mm f/1.4 lens.
Note: Take a note of the entire room that you will be using for the shoot and choose the lens focal lengths wisely.
Find Out Why Prime Lenses Are Better:
- 7 Reasons Why Prime Lenses are Better Than Zoom Lenses to Improve Your Photography
- Why You Will Probably Want to Get a Prime Lens
- Want to Fall in Love With a Lens? Try a Prime Lens
- How to Make the Most of the Affordable 50mm 1.8 Lens as a Portrait Photographer
5. Be At The Right Height
Your height, combined with the distance between you and the model, and their height will ensure you are at the proper height. Because most all portraits look best when shot at the eye-level of your model, you'll need to compensate. Sometimes this will mean bending down a little or even getting on one knee, other times you may need a step-stool or ladder to boost your height a little. The wrong perspective can really ruin a portrait.
6. Set The Right Shutter Speed – 1/125 And Forget It

Studio shooting camera settings are pretty simple and straightforward. Set your camera to manual mode, set the ISO to 100 (or 200 if you don't have 100) and the shutter speed to 1/125. Because of the strobes, there will be virtually no difference shooting at 1/100, 1/125, 1/160 or even 1/200th of a second.
Note: Since you are shooting in a studio, you will not be using longer lenses. If you happen to use lenses longer than focal length 100mm (35mm equivalent), then make sure to have the shutter speed greater than (1/focal length) taking the crop factor into account.
Have the ISO set to the lowest possible for your camera, so you get neat noise free images. In a studio, since you can make use of artificial lighting to compensate for low light, try shooting at lower ISO values.
A fantastic way to skyrocket your natural light photography skills is to practice with your Phone Camera. This week, if you grab iPhone Photo Academy at a huge discount, we will also send your our “Natural Light Buddy Notes” absolutely free. Secure the offer here.
Learn More About Shutter Speed and ISO Below:
- How Shutter Speed Affects What You Photograph
- The Rule of Equivalent Exposure (With Quick Quiz)
- How to Choose the Correct ISO Setting for Your Shot
- Getting Started With ISO: A Beginner’s Guide
7. Use A Light Meter
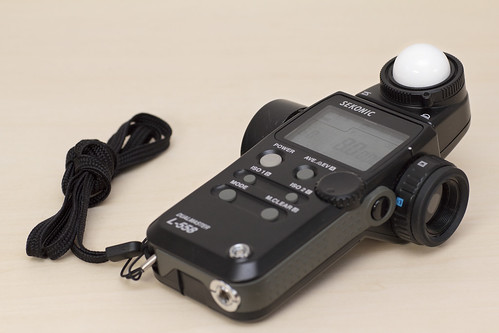
In camera metering is great, but it doesn't account for multi-light setups, nor can it help you nail your exposure on the first shot, or properly expose hair lights or background lights with a breeze. Just because you know how to read a histogram doesn't mean you shouldn't use a light meter, it will take the headaches out of lighting. You could either use incident metering or flash metering to calculate exposure.
Here Are Some Resources On Light Metering in Photography:
- An Advanced Guide to Light Metering in Photography
- A Quick Guide to Light Metering for Photographers
8. Focus On The Eyes
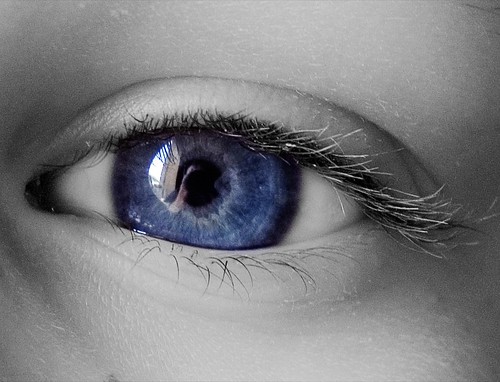
Regardless the aperture you choose, for shallow depth of field or not, the subject's eyes are what really tell the story of a portrait. Your focus should always be on the eyes, where they are looking and ensuring they are in focus.
Note: For sharper eyes, always choose the aperture values wisely. Depending on the number of people in the frame and how much area of the face you want in focus, choose the aperture value accordingly. Lenses usually tend to be sharper between f/5.6 and f/8 and this will be the best setting for group portraits.

In the above image, you can see that the eyes of the subject in the front alone is in focus while the eyes of the other two subjects are not. You will need to use a narrow aperture value in these scenarios to get the eyes of all the subjects in the frame, in focus.
Tip: If you are shooting self portraits, you can use an object like a light stand or something similar in the place where you intend to stand, manually focus and then be there yourself before releasing the shutter.
Learn How To Get Sharp Eyes In Your Portraits:
- 5 Quick Tips for Getting Sharp Eyes in Portrait Photography
- Bite Size Tips: 5 Ways to Get Sharper Eyes In Your Portraits
- How to Get Sharper Eyes in Your Portraits
- Bite Size Tips: 3 Easy Tips For Sharper Eyes In Portraits
9. Do A Custom White Balance
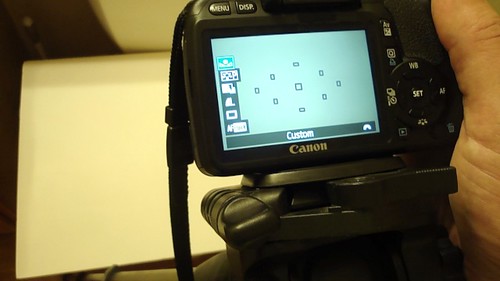
Photo By Dave Dugdale from Learn DSLR Video
We know, custom white balance is brought up here time and time again, but for good reason! Studio light modifiers, like umbrellas, softboxes and snoots all have an effect on the color output of the strobes, so doing a custom white balance before each shot ensures the most accurate possible color representation.
Learn More About Setting White Balance:
- How to Set Your White Balance Manually
- How to Adjust White Balance in Lightroom
- Everything You Need to Know About White Balance
- A Beginner’s Guide to White Balance
10. Try Just One Light

Famed fashion photographer Helmut Newton was famous for using only a single light. Doing so, and changing the angle in relation to the model can create dramatic shadows and stunning photos. Just because you have access to a handful of strobes doesn't mean you always need to use them and you can always start with ambient light from natural light even in a studio setting. There are even cheaper lights, for example an LED light, that you can experiment with for stunning portraits.
Try some more simple approaches to lighting and modifying that single light, instead of using every tool in your toolbox. Using just one light is not so simple as it sounds, but depending on how the light is placed, one can create soft and flattering (lighting at a slight angle) to dramatic portraits (side lighting) with the help of one light.
You may need to use reflectors as these can be the best choice to fill in very dark unwanted shadows and this can also give the look like you have used a key light and a fill light in your lighting setup.
11. Choose The Right Lighting Setup:
When shooting indoors, you will need to use light modifiers or diffusers to control and direct the light at your subject. Use softboxes, umbrellas and/or reflectors at the right distance to control light. For softer light, it is best to go with a white umbrella or reflectors rather than the silver ones that can make the light quite contrasty.
Here Are Some Resources On Studio Lighting Setup:
- Studio Lighting Essentials
- An Introduction to Rembrandt Lighting For Portrait Photographers
- Butterfly And Loop Portrait Lighting Setup
- How to Use Continuous Lighting for Basic Portraiture
- Don’t Miss These 7 Incredible Tutorials on Strobe Lighting for Portraits
12. Choose A Complementary Background:
Before the shoot, make sure you discuss with the client in detail about the dress colours and types that will look flattering on them and go well with the purpose of the shoot. Subtle colours are preferred more than flashing colours also, with the dress not taking away attention from the subject's face on to their dress. Also make sure that the model wears what makes them feel comfortable.
Make sure the background does not conflict with the dress colour and design. Plan this well ahead and if at all you find the dress conflicting with the background, try and change the colour or type of background if possible. Make sure you try multiple poses depending on the purpose of the shoot and choose what suits best for the purpose of the shoot.

A fantastic way to skyrocket your natural light photography skills is to practice with your Phone Camera. This week, if you grab iPhone Photo Academy at a huge discount, we will also send your our “Natural Light Buddy Notes” absolutely free. Secure the offer here.
Studio portraits can be some of the most complex shoots to set up, but also some of the most rewarding. Hopefully these ten tips will help and inspire your photography and continue on the path of knowledge.


11 Comments
Good points, but I disagree with the Primes suggestion.
I know a lot of photographers prefer primes in the studio, but a good zoom can be a lot more versatile. I use a 24-70 a lot in the studio, and what I like most about it is that at the wide end there is a very tiny amount of distortion that can really draw the subject out of the picture and create depth.
At the long end, it’s great for headshots, because it flattens the face slightly, but retains depth. If you use the wide end for a closeup shot, it can create a completely different look to the picture.
I dunno how many people would agree with me, it could just be me being cynical because I can’t afford lots of primes!
With the quality available in the “professional” zooms, you are right. Zoom lenses have come along way. I’ve seen a lot of studio photographers use the 70-200mm 2.8.
85mm f1.8 for me. 24-70mm is too heavy to move around quickly. In the studio, a prime forces me to be active and move around to get some unusual shots. A zoom would make me lazy and not creative.
Very interesting reading and fully agree on use of primes.
I like using zooms too, it’s just easier than changing lenses if you want to change the shot on the fly
I am so glad that you liked my Flickr photo so much that you included it on this page. I enjoy when people use my photos, but as I noted on Flickr below each photo I let people use my photos on the condition that they provide me credit to my learningdslrvideo.com site. Please add my link when you can. Thanks, Dave
Hi Dave
We have updated that with a nice juicy keyword link for your site. 🙂 Apologies for the oversight.
Cheers
Rob
The clock part had me laughing. I fall foul of this when shooting headshots all the time.
I spend a fair amount of time in studios and a 70-200 2.8 zoomed in creates incredible compression which actually increases the beauty aspect. I think the comment about primes is very subjective. Cheers
Any idea how to deal with photos being too dark? I can have the light super close, ISO set to 1,200 and f2 but because I do animals I need the shutterspeed to be much faster, at least 1/300, any way of combating this?
Great article. I get left and right confused even without a model. I just tell them to look at something.
Agree with primes though, much sharper.